Easy Homemade Pumpkin Puree: Make From Scratch for Fall Baking
As autumn leaves begin to fall and a crisp chill fills the air, there's a comforting ritual that calls to every home baker: the irresistible allure of pumpkin. While canned pumpkin puree is readily available, nothing quite compares to the rich flavor, vibrant color, and incredible aroma of making your own pumpkin puree recipe from scratch. This easy homemade pumpkin puree is not only simple to prepare but also elevates all your favorite fall treats, from pies to lattes, with an unparalleled freshness. Get ready to fill your kitchen with the sweet, earthy scent of roasted pumpkin and discover how effortlessly you can create this essential ingredient for your seasonal baking.
Why Make Your Own Pumpkin Puree? The Taste & Aroma Difference
You might wonder if the effort of making your own pumpkin puree is truly worth it when cans line the grocery store shelves. The answer, resoundingly, is yes! The difference in quality, flavor, and even the sensory experience is profound. Canned pumpkin puree, while convenient, often undergoes high-heat processing that can diminish its natural sweetness and vibrant color. It can also sometimes have a slightly metallic or bland undertone.
In contrast, homemade pumpkin puree, especially when made by roasting, offers a depth of flavor that is simply unmatched. Roasting caramelizes the pumpkin's natural sugars, intensifying its sweetness and imparting a rich, earthy complexity. The aroma that wafts through your kitchen as the pumpkin roasts is a delightful bonus – a warm, inviting scent that epitomizes the essence of fall. Beyond taste, making your own gives you complete control over the ingredients; there are no additives, preservatives, or hidden sugars, just pure, wholesome pumpkin. This allows the true essence of the pumpkin to shine through, providing a cleaner, more authentic base for all your culinary creations. Plus, it's often more cost-effective, especially when sugar pumpkins are in season, making this pumpkin puree recipe a rewarding endeavor for both your palate and your wallet.
Selecting the Perfect Pumpkin for Your Puree
The secret to an exceptional homemade pumpkin puree begins with choosing the right pumpkin. Not all pumpkins are created equal, especially when it comes to culinary applications. To achieve the best flavor and texture, you'll want to bypass the large, often watery, carving pumpkins (like those used for Jack-O-Lanterns) and instead seek out smaller, denser varieties.
- "Sugar Pumpkins" or "Pie Pumpkins": These are your best friends for homemade puree. They are typically small (usually 3-5 pounds), have a deep orange flesh, and are significantly sweeter and less stringy than their larger counterparts. Their flesh is dense, smooth, and contains less water, resulting in a more concentrated flavor and a silkier puree.
- What to Look For: When selecting a sugar pumpkin, choose one that feels heavy for its size, indicating a good amount of flesh. The skin should be firm, smooth, and free of soft spots, blemishes, or mold. A vibrant, uniform orange color is also a good indicator of ripeness and flavor.
- Farmer's Market Advantage: If you have access to a local farmer's market, don't hesitate to ask the farmers for their recommendations. They often grow specific varieties known for their superior taste and texture, and can offer valuable insights into which pumpkins are best for baking.
- Other Winter Squashes: While pumpkin is the star, remember that this method also works beautifully with other winter squashes like butternut, acorn, or kabocha. Each offers a slightly different flavor profile, allowing you to experiment and expand your fall baking repertoire. Just be mindful that roasting times may vary slightly depending on the squash type and size.
Step-by-Step Guide to Making Homemade Pumpkin Puree
Creating your own fresh pumpkin puree recipe is surprisingly straightforward, requiring minimal ingredients and effort for maximum flavor. Here’s how to master this essential fall staple:
Ingredients:
- 1 small baking pumpkin (e.g., sugar pumpkin, pie pumpkin), 3-5 lbs
- Optional: A pinch of salt (for roasting, enhances flavor)
- Water (for the baking sheet)
Equipment:
- Heavy chef's knife
- Cutting board
- Kitchen towels
- Large baking sheet
- Food processor or high-speed blender
Instructions:
- Preheat Oven & Prepare Pumpkin: Preheat your oven to 400°F (200°C). Line a large baking sheet with parchment paper for easier cleanup.
- Safely Cut the Pumpkin:
- Cutting a hard pumpkin can be tricky, but safety is paramount. To prevent the pumpkin from rolling, fold one-half of a kitchen towel and place it under the pumpkin on your cutting board to stabilize it. Use the other half of the towel to firmly hold the pumpkin in place with your non-dominant hand.
- Using a heavy, sharp chef's knife, pierce the pumpkin directly in the middle. Carefully and steadily cut the pumpkin in half from end to end. Avoid trying to cut through the stem, as it is incredibly tough and can be dangerous.
- Once you've cut through, wiggle the knife out, then gently pull the two halves apart.
- Scoop Out Seeds & Stringy Bits: Use a spoon or ice cream scoop to thoroughly remove all the seeds and fibrous, stringy pulp from the center of both pumpkin halves. Don't discard the seeds! You can roast them for a delicious, crunchy snack – a perfect complement to your homemade puree.
- Roast the Pumpkin:
- Place the pumpkin halves, cut-side down, onto the prepared baking sheet.
- Pour about 1/2 to 1 inch of water into the bottom of the baking sheet. This creates a steamy environment that helps the pumpkin cook more evenly and prevents it from drying out.
- Optionally, sprinkle the flesh side with a tiny pinch of salt before placing cut-side down, to bring out its natural sweetness during roasting.
- Roast for 45-60 minutes, or until the flesh is incredibly tender when pierced with a fork. Cooking time will vary depending on the size and density of your pumpkin.
- Carefully remove the baking sheet from the oven and let the pumpkin halves cool slightly until they are comfortable enough to handle.
- Scoop & Puree:
- Once cool, use a spoon to scoop the soft, cooked pumpkin flesh away from the skin. The skin should peel away easily, or the flesh will effortlessly separate. Discard the skin.
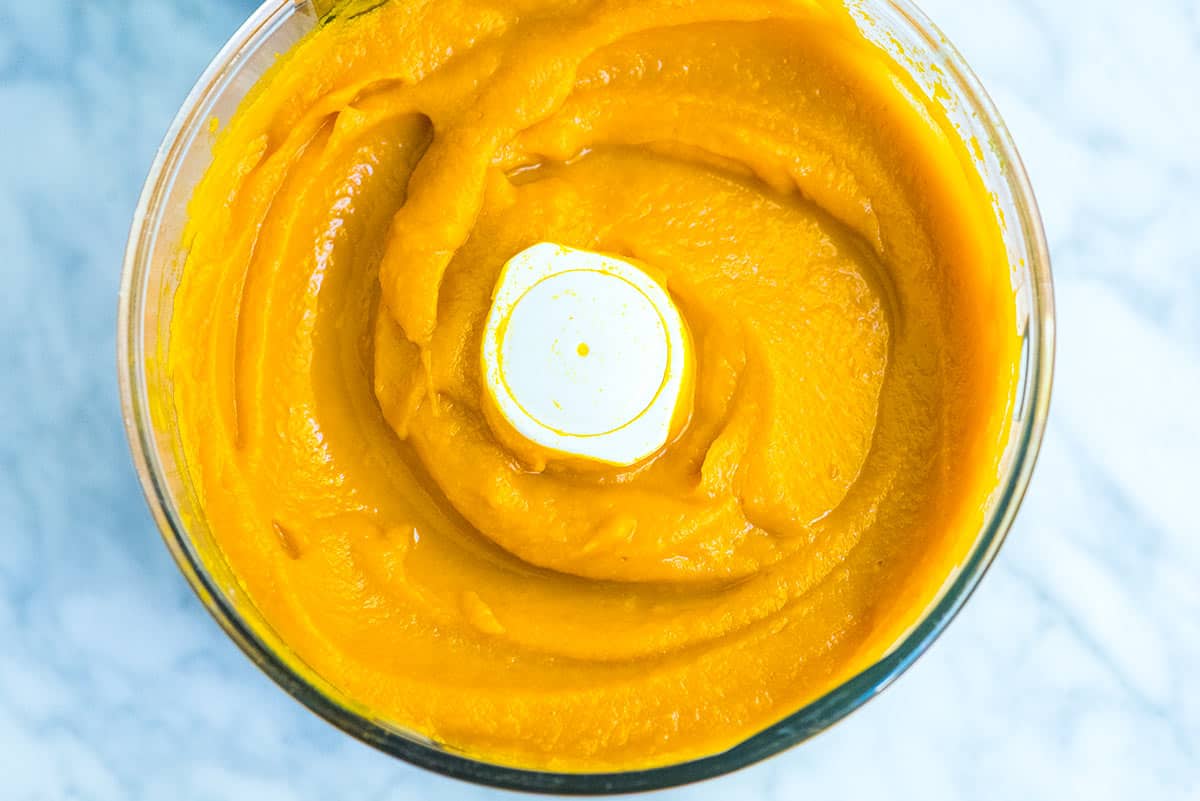
- Transfer the cooked pumpkin flesh to a food processor or high-speed blender.
- Process until completely smooth and creamy. Depending on your pumpkin's water content, the puree might be quite thick. If it seems too watery, you can drain it in a fine-mesh sieve lined with cheesecloth for an hour or two to remove excess liquid, resulting in a thicker, more concentrated puree.
- Cool & Store: Allow the pumpkin puree to cool completely before storing.
Storing Your Homemade Pumpkin Puree & Creative Uses
Once you've made your fresh batch of homemade pumpkin puree, the possibilities for delicious fall creations are endless! Proper storage ensures you can enjoy your efforts for weeks or even months. For more detailed storage tips and a plethora of ideas, check out our guide on Homemade Pumpkin Puree: Storage Tips & Versatile Uses Beyond Pie.
Storage Solutions:
- Refrigeration: Transfer your cooled pumpkin puree to an airtight container. It will keep beautifully in the refrigerator for up to 7 days, ready for immediate use in your weekly baking or cooking projects.
- Freezing for Long-Term: For longer storage, freezing is an excellent option.
- Airtight Containers: Spoon the puree into freezer-safe, airtight containers, leaving about half an inch of headspace to allow for expansion. It will last for up to 3 months in the freezer.
- Freezer Bags: For space-saving storage, transfer the puree into heavy-duty freezer bags. Lay the bags flat on a baking sheet and freeze them until solid. Once frozen, you can store them vertically to save space.
- Portioning: For convenience, consider freezing puree in measured portions (e.g., 1/2 cup or 1 cup). You can use ice cube trays for smaller portions, then transfer the frozen cubes to a freezer bag. This allows you to thaw just the amount you need for specific recipes without waste.
Creative Uses for Your Fresh Puree:
Beyond the classic pumpkin pie, your homemade puree is incredibly versatile:
- Sweet Treats: Naturally, it's perfect for pumpkin pie, but also whip up incredible pumpkin muffins, cupcakes, spiced pumpkin scones, or a cozy pumpkin chocolate chip bread.
- Breakfast Staples: Start your day right with fluffy pumpkin pancakes, or a warming pumpkin spice latte (don't forget your homemade pumpkin pie spice!).
- Savory Delights: Don't limit pumpkin to sweets! Its earthy flavor shines in savory dishes like creamy pumpkin mac and cheese, velvety pumpkin soup, hearty risottos, or even as a base for stews and curries.
- Healthy Additions: Blend it into smoothies for a nutrient boost, stir it into oatmeal, or even use it as a healthy thickening agent in sauces.
- For the Little Ones (and Furry Friends!): Homemade pumpkin puree makes an excellent, natural baby food and can even be added in small amounts to homemade dog treats (check with your vet first!).
Pumpkin Puree vs. Pumpkin Pie Filling: Knowing the Difference
It's a common point of confusion for many home bakers, but understanding the distinction between pumpkin puree and pumpkin pie filling is absolutely critical for recipe success. Many recipes explicitly state not to substitute one for the other, and for good reason.
The difference is simple, yet profound:
- Pumpkin Puree: This is exactly what our pumpkin puree recipe yields – simply cooked pumpkin that has been pureed until smooth. It contains no added spices, sugars, or other ingredients. It's the pure, unadulterated essence of pumpkin, offering a blank canvas for both sweet and savory applications.
- Pumpkin Pie Filling: This product, often found next to pumpkin puree in stores, is essentially pumpkin puree that has already been seasoned. It typically contains a pre-mixed blend of sugar and classic fall spices such as cinnamon, nutmeg, ginger, and cloves, and sometimes other ingredients like milk or eggs. It's formulated specifically to be the base for pumpkin pie, saving you a step.
Why does this matter? Substituting pumpkin pie filling for pure pumpkin puree in a recipe (or vice-versa) will drastically alter the flavor, sweetness level, and even the consistency of your dish. If a recipe calls for pumpkin puree, it expects a neutral base to which you'll add your own measured spices and sweeteners. Using pie filling will result in an overly sweet and spiced dish, throwing off the intended balance. Conversely, using plain puree when pie filling is required will leave your dish bland and under-seasoned. Always double-check your recipe to ensure you're using the correct ingredient!
Embrace the Flavor of Fall
Making your own homemade pumpkin puree is a culinary journey that promises incredibly rewarding results. From the delightful aroma that fills your home during roasting to the superior taste it imparts to every dish, it's an experience that truly elevates your fall baking. This simple pumpkin puree recipe provides a fresh, natural base for everything from beloved pies to inventive savory creations. So, skip the can this season and embrace the joy of making pumpkin puree from scratch. You'll not only savor the rich, authentic flavor but also the satisfaction of creating something truly special for your friends, family, and yourself. Happy fall baking!
